Setting Up a Blog on GitHub in Four Simple Steps
Let’s skip the impractical details and get straight to the point. We need a GitHub account and Git installed. In a nutshell, the process is as follows:
- Forking Minimal Mistakes blog template
- Configuring the blog
- Installing Jekyll software to set up the blog locally
- Finishing
Note that the blog name matches the GitHub user name. For example, if the GitHub user name is ArtemBaranov, the blog will be available at artembaranov.github.io.
1. Forking Minimal Mistakes
Minimal Mistakes is a blog template, i e what the blog will look like. Go straight to its repo page and Fork -> Create a New fork, set Repository name to username.github.io, next Create fork. Now go to the list of repositories and you will see your username.github.io.


To make the blog available online, go to the settings of the created repository, Settings->Pages->Build and deployment->Branch, and set your branch to master. Now we can go to the repo and wait a bit for GitHub to rebuild the necessary files.


Now the blog is online.
2. Configuring the Blog
The main blog preferences are stored in _config.yml. There we can choose the blog skin, set its title, information about the author, etc. Here are also web links to the author’s social network networks. More information can be found in the documentation.

3. Installing Jekyll software
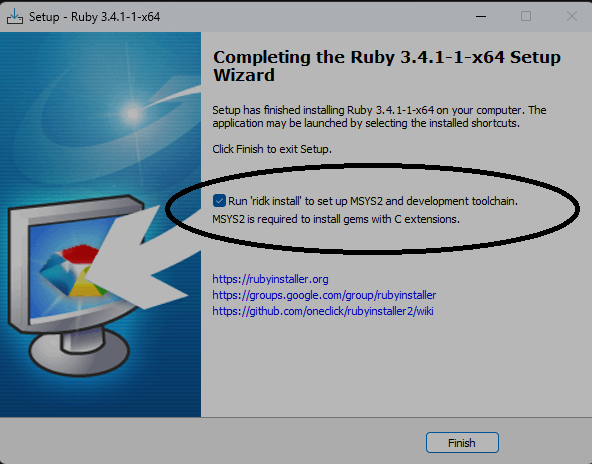
This is required to browse the site locally. We need to download and install a Ruby+Devkit version from the official source here. Or here’s the link to downloading the latest Ruby+Devkit 3.4.1-1 (x64) ~136MB. Skip the SmartScreen warning, no need to change the installation options except the installationg path. After the installation is complete, a window should appear suggesting to run ridk install.

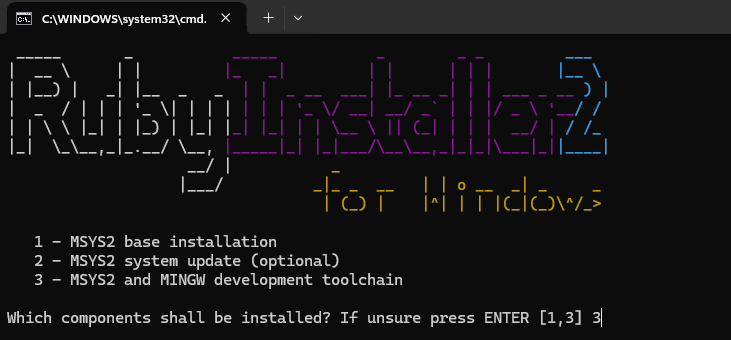
In the appeared console, select MSYS2 and MINGW development toolchain. Skip errors like ==> ERROR: Could not update key:.

If the same question appears again, press Ctrl+C to close the console window. Now open a new command prompt and type
gem install jekyll bundler
This process takes some time. Next, execute jekyll -v to ensure the process succeeded.
4. Finishing
Now we can clone our site and browse it locally.
git clone https://github.com/ArtemBaranov/artembaranov.github.io.git
Run the following command from the repo directory to start the Jekyll server and browse the site.
bundle exec jekyll serve
If you get the following error,

execute the following commands
gem install bundler
gem install jekyll-sitemap -v "~> 1.3"
bundle install
Then
bundle exec jekyll serve
In case of this error,

execute the following commands
gem install csv
Open the Gemfile from the repo and add gem "csv" to the end, next
bundle install
bundle exec jekyll serve
In case of this,

execute the following commands
gem install base64
Open the Gemfile from the repo and add gem "base64" to the end, next
bundle install
bundle exec jekyll serve
Now you should get the following message at the end

After going to http://127.0.0.1:4000, we can browse our blog. Note that Jekyll creates a directory named _site in the blog repository and contains the blog files, including, posts and images. This directory is not intended for committing. If another error appears when running bundle exec jekyll serve, copy package.json from the repo root to the _site subfolder.
Blog posts should be created in the _posts directory, named YEAR-MM-DD-name.md, and follow GitHub markdown syntax rules. Each post must have the following header.
---
title: "Blog title"
layout: single
date: YYYY-MM-DD
tags: [posts]
excerpt: "A short summary of the blog"
---
To make new posts and all other edits available on the website, we need to commit the changes and wait a bit for GitHub to apply them.
git pull
git status
git add .
git commit
git push